Whirlpool Dishwasher Parts Manual: A Comprehensive Guide
This detailed manual assists with Whirlpool dishwasher maintenance, offering diagrams and instructions for parts identification and replacement, ensuring optimal performance․
Whirlpool dishwashers are renowned for their reliability and innovative features, becoming a staple in many modern kitchens․ Understanding the intricacies of these appliances, however, often requires a deeper dive than the user manual provides․ This section introduces the core components and operational principles of Whirlpool dishwashers, setting the stage for more detailed parts identification and troubleshooting․
From the Quiet Partner I and II series to newer models, Whirlpool consistently integrates advanced washing technologies․ These technologies rely on a complex interplay of parts – spray arms, pumps, valves, and electronic controls – all working in harmony to deliver sparkling clean dishes․ This guide aims to demystify these systems, empowering owners and technicians alike to effectively maintain and repair these essential kitchen appliances․ Proper maintenance extends the lifespan and efficiency of your Whirlpool dishwasher․
Understanding Your Dishwasher Model
Whirlpool dishwashers come in a variety of models, each with unique features and component layouts․ Identifying your specific model is crucial for accurate parts sourcing and repair procedures․ Variations exist even within series like the Quiet Partner II and III, impacting the compatibility of replacement parts․ This section emphasizes the importance of recognizing these distinctions․
Different models may utilize slightly different spray arm designs, pump assemblies, or control panel configurations․ Accessing the correct parts diagram for your dishwasher ensures a successful repair․ Furthermore, understanding the specific features of your model – such as sanitize cycles or adjustable racks – can aid in diagnosing operational issues․ Referencing the original user manual, alongside this parts manual, provides a comprehensive understanding of your appliance’s capabilities and maintenance requirements․
Locating Your Dishwasher’s Model Number
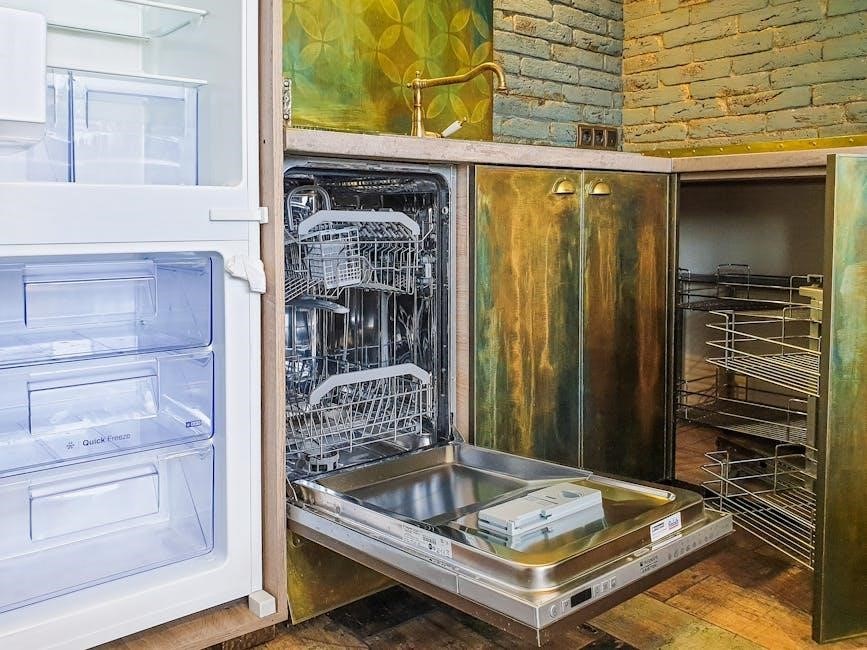
Finding your Whirlpool dishwasher’s model number is the first step towards successful parts identification and repair․ This unique identifier unlocks access to specific diagrams, parts lists, and troubleshooting guides tailored to your appliance․ Typically, the model number is located on a sticker or plate within the dishwasher․
Common locations include the side of the door jamb, the interior frame when the door is opened, or on the back panel of the unit․ You may need a flashlight to easily view the sticker․ The model number is usually a combination of letters and numbers․ Record this number carefully, as even a slight error can lead to ordering incorrect parts․ Having the serial number handy is also beneficial, as it can pinpoint the exact manufacturing date and any specific revisions to the model․
Essential Dishwasher Parts & Their Functions
Key components like spray arms, pumps, valves, and the control panel work together to deliver clean dishes efficiently and reliably within your Whirlpool dishwasher․
Spray Arms & Wash Impellers
Spray arms are crucial for distributing water throughout the dishwasher, ensuring comprehensive cleaning coverage․ Whirlpool dishwashers utilize various spray arm designs, including upper, lower, and sometimes specialized arms for specific zones․ Wash impellers, often found in newer models, enhance water circulation and cleaning power by creating a more forceful spray․
Over time, spray arms can become clogged with food particles or mineral deposits, reducing their effectiveness․ Regularly inspecting and cleaning the spray arm nozzles is essential for maintaining optimal performance․ Replacement may be necessary if the arms are cracked, damaged, or consistently fail to deliver adequate water pressure․ Identifying the correct spray arm for your specific Whirlpool model is vital; parts diagrams and model numbers are key to accurate selection․ Proper installation ensures even water distribution and spotless results․
Wash Pump & Motor Assembly
The wash pump and motor assembly is the heart of the dishwasher’s cleaning system, responsible for circulating water with sufficient force․ This assembly typically includes the motor, impeller, and housing, working in unison to deliver pressurized water to the spray arms․ Whirlpool dishwashers employ various pump designs, and selecting the correct replacement part is crucial for proper function․
A failing wash pump often manifests as weak water spray, insufficient cleaning, or unusual noises during operation․ Diagnosing pump issues requires checking for obstructions, voltage supply, and motor continuity․ Replacement involves disconnecting electrical connections, removing the old assembly, and installing the new one, ensuring proper sealing to prevent leaks․ Always consult your dishwasher’s parts diagram and model number to guarantee compatibility and a successful repair․
Drain Pump & Components
The drain pump is vital for removing wastewater from the dishwasher after each cycle, preventing standing water and ensuring optimal performance․ This assembly comprises the pump motor, impeller, and often a check valve to prevent backflow․ Whirlpool dishwashers utilize various drain pump configurations, so accurate part identification based on the model number is essential․
A malfunctioning drain pump typically presents as standing water in the dishwasher tub, or the dishwasher failing to complete a cycle․ Common issues include impeller blockage from food debris, a failed pump motor, or a faulty check valve․ Repair often involves clearing obstructions, testing the pump’s electrical continuity, and replacing the entire assembly if necessary․ Proper installation, including secure hose connections, is crucial to avoid leaks and ensure effective drainage․
Water Inlet Valve
The water inlet valve controls the flow of fresh water into the dishwasher, opening and closing based on signals from the control board․ This component typically features multiple solenoids, each regulating hot and cold water supply for precise temperature mixing․ Identifying the correct valve for your Whirlpool model is paramount, as variations exist in connection types and voltage requirements․
A faulty water inlet valve can manifest as insufficient water entering the dishwasher, or continuous water flow even when the dishwasher is off, potentially leading to flooding․ Common causes include solenoid failure, debris obstructing the valve, or electrical issues․ Testing the valve with a multimeter can determine if the solenoids are receiving power and functioning correctly․ Replacement involves disconnecting the water supply lines and electrical connections, ensuring a watertight seal upon installation․
Heating Element & Thermostat
The heating element raises the water temperature for effective cleaning and sanitization, while the thermostat regulates this temperature to prevent overheating․ Typically located at the base of the dishwasher tub, the heating element converts electrical energy into heat․ The thermostat monitors the water temperature and cycles the element on and off to maintain the desired level, usually between 120°F and 140°F․
A malfunctioning heating element may result in lukewarm water, leading to poor cleaning performance, or a complete lack of heating․ A faulty thermostat can cause overheating or prevent the element from activating․ Testing the element for continuity with a multimeter and the thermostat’s resistance are crucial diagnostic steps․ Replacement requires disconnecting the electrical supply and carefully removing the old component, ensuring proper grounding of the new element․
Control Panel & User Interface
The control panel serves as the central command for your Whirlpool dishwasher, allowing users to select wash cycles, options, and initiate operation․ Modern dishwashers feature electronic control panels with digital displays, while older models utilize mechanical timers and knobs․ The user interface includes buttons or touchpads for cycle selection (e․g․, Normal, Heavy, Delicate), options like heated dry or sanitize, and start/cancel functions․
A malfunctioning control panel can manifest as unresponsive buttons, incorrect cycle selection, or a complete failure to start․ Diagnosing control panel issues often involves checking the membrane switch assembly (for button-based panels) or the electronic control board․ Replacement may require removing the dishwasher’s access panels and carefully disconnecting wiring harnesses․ Always consult the wiring diagram before attempting any repairs․
Door Latch & Interlock

The door latch and interlock mechanism are crucial safety components, preventing the dishwasher from operating when the door isn’t securely closed․ This system ensures water doesn’t leak and protects users from potential hazards during operation․ The latch typically consists of a lever, a striker plate, and an interlock switch․ When the door is closed, the latch engages, activating the interlock switch, which signals the control board that it’s safe to start․
A faulty door latch can prevent the dishwasher from starting, or cause it to stop mid-cycle․ Common issues include a broken latch, a misaligned striker plate, or a defective interlock switch․ Replacement usually involves removing the door panel and carefully disconnecting the wiring to the interlock switch․ Testing the switch with a multimeter is recommended to confirm its functionality before replacing the entire assembly․
Common Whirlpool Dishwasher Problems & Parts Replacement
Addressing frequent issues like poor cleaning, drainage failures, startup problems, and leaks requires identifying faulty parts and following replacement procedures carefully․
Dishwasher Not Cleaning Properly
A dishwasher failing to clean dishes effectively often stems from issues with the spray arms or a clogged filter system․ Inspect the spray arms for blockages – food particles can easily accumulate within the nozzles, hindering water distribution․ Removal and thorough cleaning, using a toothpick or small wire, is often sufficient․ If the arms are damaged, replacement is necessary, ensuring proper water pressure for optimal cleaning․
Furthermore, a dirty filter prevents proper water circulation, redepositing food debris onto dishes․ Regularly removing and cleaning the filter – typically located at the bottom of the dishwasher – is crucial․ Depending on the model, filters may require rinsing or a more detailed scrub․ Severely damaged or worn filters should be replaced to maintain peak dishwasher performance and prevent recurring cleaning issues․ Consistent maintenance of these components dramatically improves cleaning results․
Spray Arm Issues & Replacement
Whirlpool dishwasher spray arms distribute water for cleaning; issues include clogs, cracks, or loose connections․ Clogged spray arms reduce water pressure, leading to poor cleaning․ Remove the arm and use a toothpick or wire to clear any food debris blocking the nozzles․ Inspect for cracks or damage – even small fissures can disrupt water flow․ A damaged spray arm must be replaced for effective cleaning․
Replacement is straightforward: locate the correct part number for your model (refer to the parts manual), detach the old arm (usually a simple snap-on or screw-in mechanism), and install the new one․ Ensure a secure connection to prevent leaks or reduced performance․ Regularly checking spray arms during filter cleaning can prevent significant issues and maintain optimal dishwasher functionality․ Proper spray arm operation is vital for spotless dishes․
Filter Cleaning & Replacement
Dishwasher filters trap food particles, preventing them from recirculating and ensuring clean dishes․ Regular cleaning is crucial; a clogged filter drastically reduces cleaning performance and can even cause drain issues․ Most Whirlpool dishwashers have a self-cleaning filter system, but periodic manual cleaning is still necessary․ Locate the filter (usually at the bottom of the dishwasher interior) and remove it according to your model’s instructions․
Rinse the filter thoroughly under running water, using a soft brush to remove stubborn debris․ Inspect for cracks or damage; a damaged filter needs replacement․ Replacement filters are readily available based on your dishwasher’s model number․ Installing a new filter is simple – align it correctly and secure it in place․ Cleaning the filter monthly, or more frequently with heavy use, maintains optimal dishwasher efficiency and prevents unpleasant odors․
Dishwasher Not Draining
A dishwasher failing to drain is a common issue, often stemming from a blockage or a faulty drain pump․ Before diving into parts, check the drain hose for kinks or obstructions․ Ensure the air gap (if present) isn’t clogged – this prevents wastewater from flowing back into the dishwasher․ A clogged filter, as discussed previously, can also contribute to draining problems․
If these simple checks don’t resolve the issue, the drain pump itself may be failing․ Accessing the drain pump usually involves removing the lower access panel․ Inspect the pump for debris and test its functionality with a multimeter․ Replacement drain pumps are model-specific and relatively easy to install, following the instructions in your parts manual․ Ignoring a draining issue can lead to water damage and further complications․
Drain Pump Failure & Replacement
When a Whirlpool dishwasher won’t drain, a faulty drain pump is a prime suspect․ Signs of failure include a humming sound during the drain cycle, or no sound at all․ To diagnose, disconnect power and access the pump – typically located at the base of the dishwasher․ Visually inspect for obstructions like broken impeller blades or foreign objects․
Testing with a multimeter can confirm if the pump is receiving power but not functioning․ Replacement involves disconnecting the old pump’s wiring and hose clamps, then connecting these to the new pump․ Ensure a secure fit to prevent leaks․ Always use a genuine Whirlpool replacement part for optimal compatibility and performance․ Proper installation, guided by your dishwasher’s parts diagram, is crucial for restoring draining functionality․
Air Gap Problems & Solutions
The air gap, usually found on the sink deck, prevents wastewater from flowing back into the dishwasher․ A clogged air gap is a common cause of draining issues․ Symptoms include slow draining or standing water in the dishwasher․ To address this, remove the air gap cover and clear any debris – food particles, grease, or soap buildup – from within․
Disassemble the air gap further for a thorough cleaning, ensuring all passages are clear․ If the air gap is damaged or cracked, replacement is necessary․ Reconnect the hoses securely, verifying proper alignment․ A functioning air gap ensures efficient drainage and prevents contamination․ Consult your dishwasher’s parts diagram for correct air gap identification and installation procedures․
Dishwasher Not Starting
When your Whirlpool dishwasher fails to start, several components could be at fault․ Begin by verifying the power supply – check the circuit breaker and ensure the dishwasher is properly plugged in․ A faulty door latch is a frequent culprit; if the latch doesn’t securely engage, the dishwasher won’t initiate a cycle․ Inspect the latch for damage and test its functionality․
If the latch appears fine, the control board might be the issue․ A malfunctioning control board can prevent the dishwasher from receiving the start signal․ Diagnosis often requires a multimeter to test for continuity and voltage․ Replacement of the control board may be necessary․ Always disconnect power before attempting any repairs․ Refer to your model’s wiring diagram for safe and accurate troubleshooting․
Door Latch Malfunction & Repair
A malfunctioning door latch is a common reason why a Whirlpool dishwasher won’t start․ The latch ensures the door is securely closed, activating a safety switch that allows the cycle to begin․ Inspect the latch assembly for visible damage, such as cracks or broken plastic components․ Test the latch by manually pressing the switch; it should click and feel secure․
To repair or replace, first disconnect power to the dishwasher․ Remove any screws securing the latch assembly to the dishwasher frame․ Gently detach the old latch and install the new one, ensuring it’s properly aligned․ Reconnect the wiring harness and reattach any screws․ Test the new latch to confirm it engages the safety switch correctly before restoring power and running a test cycle․ Always consult your dishwasher’s parts diagram for specific instructions․
Control Board Issues & Diagnosis
The control board is the “brain” of your Whirlpool dishwasher, managing all functions․ Diagnosing control board issues requires caution, as it involves electrical components․ Symptoms include the dishwasher not responding to inputs, cycles stopping mid-run, or error codes displayed․ Before assuming a faulty control board, check simpler issues like a tripped breaker or loose wiring․
To test, visually inspect the board for burnt components or damaged capacitors․ A multimeter can be used to check for voltage and continuity, but this should only be done by someone comfortable with electrical work․ Replacing the control board often requires programming or calibration to match your specific model․ Refer to your dishwasher’s wiring diagram and parts list for correct replacement procedures and part numbers․ Disconnect power before any inspection or repair!
Dishwasher Leaking
Dishwasher leaks can cause significant water damage, requiring prompt attention․ Common leak sources include the door gasket, water inlet valve, spray arm connections, and drain hose․ Begin by inspecting the door gasket for cracks, tears, or debris preventing a tight seal․ A worn gasket needs replacement to prevent water escaping during cycles․
Next, check the water inlet valve and its connections for any signs of leakage․ Tighten connections if loose, and replace the valve if it’s cracked or faulty․ Inspect the spray arms and ensure they are securely attached․ Finally, examine the drain hose for punctures or loose clamps․ Always disconnect power and water supply before inspecting or repairing any dishwasher component․
Door Gasket Replacement
A damaged door gasket is a frequent cause of dishwasher leaks․ Replacing it restores the watertight seal essential for proper operation․ First, disconnect the dishwasher’s power supply․ Carefully remove the old gasket, noting its orientation for correct installation of the new one․ Typically, gaskets are held in place by a friction fit or adhesive․
Clean the door’s gasket groove thoroughly to remove any old adhesive or debris․ Apply new adhesive (if required by the replacement gasket) evenly along the groove․ Gently press the new gasket into place, ensuring it’s fully seated and aligned correctly․ Allow the adhesive to cure completely before restoring power and running the dishwasher․ A properly installed gasket prevents water from escaping during wash cycles, protecting your kitchen floor․
Water Inlet Valve Leak Repair
A leaking water inlet valve can cause significant water damage․ Before starting, disconnect power to the dishwasher․ Locate the valve – usually at the back of the appliance where the water supply line connects․ Inspect the valve body and connections for visible cracks or loose fittings; Tighten any loose connections carefully, avoiding excessive force․
If the valve itself is cracked, it requires replacement․ Disconnect the water supply line and electrical connections to the valve․ Install the new valve, ensuring secure connections for both water and electricity․ Always use Teflon tape on threaded connections to prevent leaks․ Reconnect the water supply and power, then test for leaks before resuming normal operation․ A functioning inlet valve ensures proper water flow into the dishwasher․
Advanced Troubleshooting & Parts
This section delves into complex dishwasher issues, covering components like float switches, timers, and wiring, for experienced repair technicians․
Float Switch & Overflow Protection
The float switch is a crucial safety component within your Whirlpool dishwasher, diligently preventing overflows and potential water damage․ Located typically at the base of the dishwasher’s tub, it rises with the water level․ When the water reaches a predetermined height, the float switch activates, signaling the water inlet valve to shut off the water supply․
A malfunctioning float switch can manifest in several ways․ If the dishwasher continues to fill even after reaching capacity, the switch may be stuck or faulty․ Conversely, if the dishwasher doesn’t fill adequately, the switch might be prematurely activating․ Troubleshooting involves visually inspecting the float for obstructions and testing its continuity with a multimeter․ Replacement is a straightforward process, often requiring only basic tools and access to the dishwasher’s lower panel․ Proper function ensures reliable overflow protection, safeguarding your kitchen from costly water damage․
Timer & Control Module
The timer and control module represent the ‘brain’ of your Whirlpool dishwasher, orchestrating the entire wash cycle․ Older models utilize electromechanical timers, relying on a series of cams and switches to advance through the cycle stages․ Newer dishwashers employ electronic control modules (ECMs), utilizing a circuit board and programmed software for precise operation․
Symptoms of a failing timer or control module include erratic cycle behavior, failure to start, or inability to complete a cycle․ Diagnosing these issues often requires a service manual and a multimeter to test for voltage and continuity․ Replacement of an ECM typically involves programming the new module to match your specific dishwasher model․ While timer replacement is generally simpler, ensuring correct wiring is paramount․ A properly functioning timer or control module is essential for consistent and reliable dishwasher performance, guaranteeing sparkling clean dishes every time․
Wiring Diagrams & Electrical Components
Understanding the electrical system of your Whirlpool dishwasher is crucial for safe and effective repairs․ Wiring diagrams, often found inside the access panel or in the service manual, illustrate the connections between components like the heating element, wash pump, control board, and door interlock․ Key electrical components include the power cord, terminal block, and various wiring harnesses․
Always disconnect power before working with electrical components! Use a multimeter to test for voltage and continuity, verifying proper connections and identifying shorts or open circuits․ Common issues involve frayed wires, loose connections, or a faulty terminal block․ Replacing damaged wiring requires matching the gauge and insulation type․ Incorrect wiring can lead to malfunctions or even safety hazards․ Referencing the correct wiring diagram is essential for a successful and safe repair, restoring your dishwasher’s functionality․
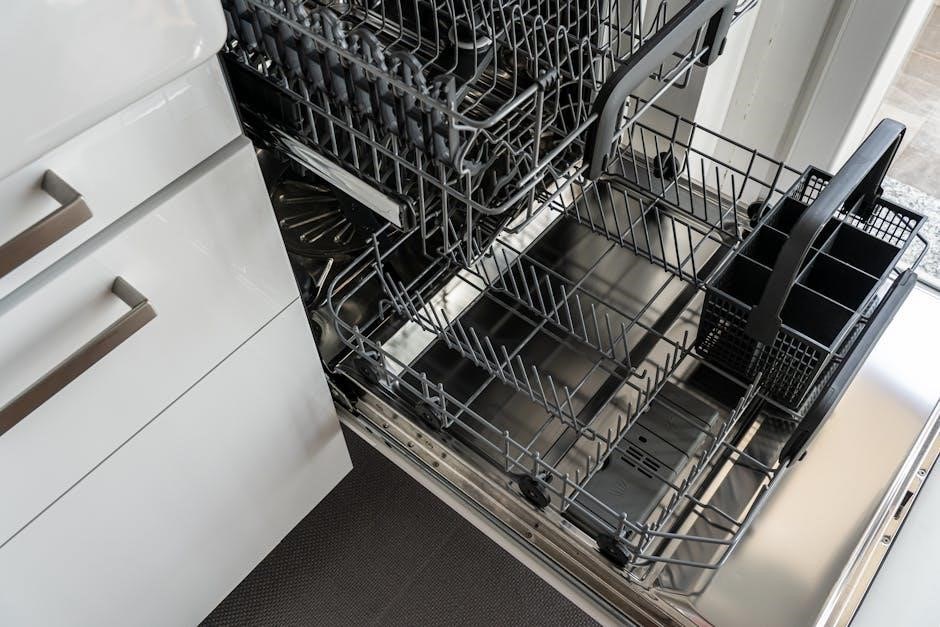
Silverware Basket & Rack Components
The silverware basket and dish racks are essential for organizing and securing items during the wash cycle․ Whirlpool dishwashers utilize various rack designs, including adjustable upper racks and specialized compartments for utensils and larger cookware․ Common components include the silverware basket itself, adjustable tines, rack rollers, and support legs․
Over time, these components can become damaged or worn․ Broken tines can scratch dishes, while faulty rollers hinder smooth rack operation․ Replacement baskets and individual tines are readily available․ Inspect the rack slides and supports for corrosion or damage, ensuring smooth movement․ Properly functioning racks maximize dishwasher capacity and prevent damage to your dishes․ Maintaining these components ensures efficient cleaning and prolongs the life of your Whirlpool dishwasher․
Detergent Dispenser & Components
The detergent dispenser is crucial for releasing detergent at the optimal time during the wash cycle․ Whirlpool dishwashers feature various dispenser designs, often including a main wash compartment, a pre-wash compartment, and a rinse aid dispenser․ Key components include the dispenser door, latch, internal cups, and release mechanisms․
A malfunctioning dispenser can lead to poor cleaning performance․ Common issues include a stuck door, a broken latch, or a clogged dispenser․ Regularly cleaning the dispenser with warm water removes detergent buildup․ Replacement dispensers or individual components like the latch or door are available if needed․ Ensure the dispenser is properly loaded with the correct type and amount of detergent for effective cleaning․ A functioning dispenser guarantees dishes receive the necessary cleaning agents at the right stage․
Dishwasher Insulation & Soundproofing
Effective insulation and soundproofing are vital for a quiet and energy-efficient dishwasher operation․ Whirlpool dishwashers utilize various insulation materials, typically fiberglass or foam, strategically placed within the dishwasher’s cabinet․ These materials minimize heat loss, maintaining water temperature for optimal cleaning and reducing energy consumption․
Sound dampening features, like insulation and rubber gaskets, significantly reduce noise levels during operation․ Damaged or missing insulation can lead to increased noise and reduced energy efficiency․ Inspecting the insulation around the dishwasher’s sides, base, and door is crucial during maintenance․ Replacement insulation panels or soundproofing materials are available to restore quiet operation and energy savings․ Proper insulation contributes to a more peaceful kitchen environment and lowers utility bills․