
Code Alarm Remote Start Manual: A Comprehensive Guide
This manual details the Code Alarm Professional Series remote start system, covering control usage, vehicle operation, safety features, and troubleshooting steps.
It provides instructions for programming, valet mode, and understanding system indicators, ensuring optimal performance and user experience with your vehicle’s remote start.
Understanding Your Code Alarm System
Your Code Alarm system is a sophisticated vehicle security and convenience package, designed to provide both protection against theft and the comfort of remote starting capabilities. This system integrates seamlessly with your vehicle’s existing electronics, offering features like keyless entry, remote engine start, and alarm functionalities.
Understanding the core components – the remote control, the control module, and the vehicle interface – is crucial for effective operation. The system utilizes a combination of sensors and relays to monitor vehicle status and execute commands. Familiarizing yourself with the LED indicator and audible chirps will help diagnose system behavior.
Proper operation relies on correct programming and adherence to safety guidelines, ensuring reliable performance and preventing unintended activation.
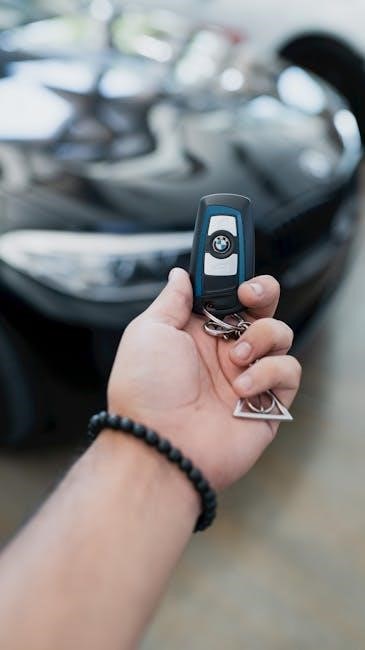
Remote Control Overview
The Code Alarm remote control is your primary interface for operating the system’s features, including remote start, lock/unlock functions, and alarm control. It’s designed for user-friendly operation, typically featuring clearly labeled buttons for each function.
The remote utilizes radio frequency (RF) technology to communicate with the vehicle’s control module, allowing for operation from a distance. The range can vary depending on environmental factors and battery strength.
Regularly check the remote’s battery level to ensure consistent performance. A weak battery can lead to reduced range or failure to operate. Replacement procedures are outlined in a dedicated section of this manual.
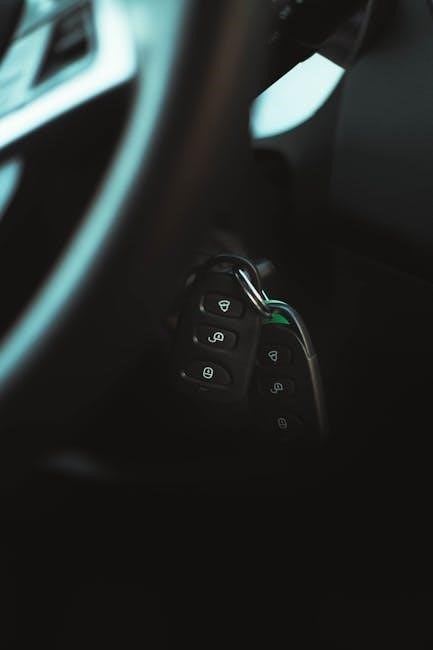
Remote Control Buttons and Functions
Your Code Alarm remote features several buttons, each assigned specific functions. Typically, a dedicated “Start” button initiates the remote start sequence. Lock and Unlock buttons control the vehicle’s door locks, while a Panic button activates the alarm’s siren and hazard lights.
Some models include additional buttons for auxiliary functions, such as trunk release or power window control. The valet/programming button, often recessed to prevent accidental activation, is crucial for system configuration and override functions.
Refer to the diagram included with your remote for precise button identification and function details.
Remote Control Battery Replacement
Maintaining your remote’s battery is essential for reliable operation. When the remote’s range diminishes or it fails to function, a battery replacement is likely needed. Typically, the remote housing separates into two halves, often with a small slot for prying it open.
Carefully remove the existing battery, noting its orientation (+/-) for correct replacement. Install a new battery of the same type – commonly a CR2032 – ensuring proper polarity.
Reassemble the remote housing securely, and test its functionality.
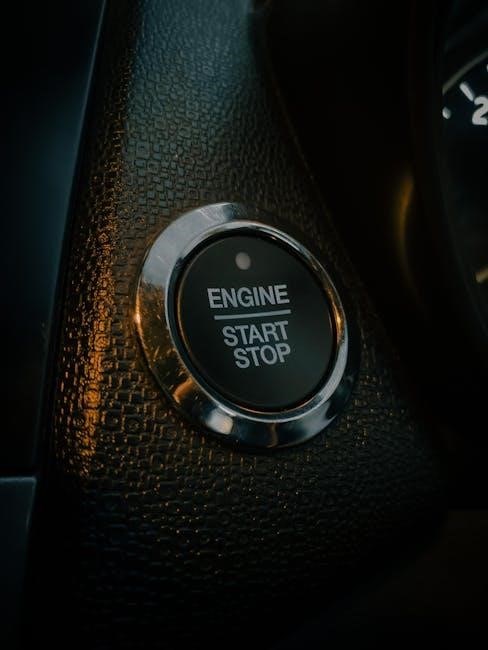
Remote Starting Your Vehicle
Initiating remote start offers convenience, especially in extreme weather. Before attempting, ensure your vehicle is parked in a safe location, and the hood is closed. The system requires a pre-start check, verifying conditions are suitable for starting – like the parking brake being engaged.
Press the designated remote start button; the vehicle should begin running. If it doesn’t, consult the troubleshooting section. Remember to never remote start if people or obstructions are nearby.
Always prioritize safety when utilizing this feature.
Pre-Start System Check
Before each remote start attempt, the system performs a crucial pre-start check. This automated sequence verifies several conditions to ensure safe operation. Key checks include confirming the parking brake is firmly engaged, preventing unintended vehicle movement.
The system also assesses if the hood is securely closed, and that critical safety components are functioning correctly. If any condition isn’t met, the remote start will be inhibited, indicated by a lack of response or specific light flashes.
This check is vital for preventing accidents.
Initiating Remote Start
To initiate remote start, press and release the designated remote control button – typically marked with a car icon and an arrow. The system will acknowledge the command with a brief audible chirp or a visual indication, like a light flash.
The engine will then start automatically, running for the pre-programmed duration. Ensure the vehicle is in Park or Neutral before attempting to remote start.
If the system doesn’t respond, verify the pre-start conditions are met and the remote battery is functional.
Remote Start Shutdown Procedure
To shut down the engine while in remote start mode, simply press the same remote control button used to initiate the start sequence – the car icon with an arrow.
The engine will immediately cease operation, and the system will confirm the shutdown with an audible chirp or a visual signal.
Alternatively, inserting the key into the ignition and turning it to the ‘ON’ position will also terminate the remote start function. Ensure the vehicle is fully stopped before operating it normally.

Safety Features of Remote Start
Code Alarm prioritizes safety with several integrated features. The system prevents remote start if the hood is open, ensuring no operation occurs with potential mechanical issues.
Additionally, the brake pedal must be depressed before the engine can be started with the key, preventing accidental movement.
A remote start override function allows immediate control upon key insertion, while valet mode disables remote start, enhancing security. These features guarantee responsible and secure operation, protecting both the vehicle and occupants.
Remote Start Override Function
The Remote Start Override Function provides immediate vehicle control. Upon inserting the key into the ignition, the remote start system automatically disengages, granting the driver full operational command.
This feature ensures a seamless transition from remote operation to manual driving, prioritizing driver control in any situation.
Simply put the key in and turn it to the ON position; the system will instantly respond, overriding the remote start and allowing for standard vehicle operation. This is a crucial safety mechanism.
Remote Start Valet Mode Activation/Deactivation
Valet Mode disables the remote start functionality, enhancing vehicle security when entrusted to others. Activation involves accessing the system’s valet/programming button, typically located on the antenna.
To activate, turn the ignition ON, then OFF, repeating this sequence. Subsequently, press and release the valet/programming button three times. A single chirp confirms activation.
Deactivation follows a similar process: repeat the ignition cycle and press the button three times again, indicated by two chirps. This prevents unauthorized remote starts, safeguarding your vehicle.
Entering the Vehicle During Remote Start
When your vehicle is remotely started, the system offers features for seamless entry. An Automatic Disarm Feature may be present, allowing immediate access upon opening the door – check your specific model’s capabilities.
If automatic disarm isn’t active, a Manual Disarm Procedure is required. This typically involves pressing the unlock button on your remote fob. The system will then safely shut down the remote start, enabling ignition.
Always ensure the vehicle is fully stopped before attempting to shift into gear or drive.
Automatic Disarm Feature

The Automatic Disarm Feature provides convenient, keyless entry when your vehicle is running via remote start. Upon opening a door, the system intelligently recognizes your arrival and automatically disarms the security system.
This eliminates the need to manually disarm with a fob button before starting the ignition. However, functionality varies by system configuration.
Confirm if your Code Alarm system includes this feature by testing it – opening the door should immediately disable the alarm and prepare the vehicle for driving.
Manual Disarm Procedure
If the Automatic Disarm Feature isn’t functioning or preferred, you can manually disarm your Code Alarm system. This typically involves pressing the unlock button on your remote fob.
Alternatively, some systems require momentarily pressing the valet/programming button located on the antenna. The system will respond with a chirp, confirming disarming.
Always refer to your specific model’s documentation for the precise procedure. Disarming is crucial before attempting to start the vehicle with the key, preventing potential system errors or unwanted alarm activation.
Utilizing Vehicle Climate Control with Remote Start
Code Alarm’s remote start functionality often integrates with your vehicle’s climate control system. This allows for preheating or precooling the cabin before entering, enhancing comfort.
The system typically remembers the last HVAC setting when the vehicle was turned off. Upon remote start, it will reactivate those settings.
Some models offer programmable features to automatically activate the climate control during remote start, regardless of the previous setting. Consult your system’s specific instructions for customization options and optimal climate control usage.
Preheating the Vehicle Interior
During colder months, utilizing the remote start to preheat your vehicle’s interior provides significant comfort. The Code Alarm system, when properly integrated, activates the heater core.
This warms the cabin before you enter, defrosting windows and ensuring a pleasant driving experience. The system generally defaults to the heater’s last used settings.
Ensure the HVAC system is set to a desired temperature and fan speed before remotely starting the vehicle for optimal preheating. Some systems allow programmable temperature settings for automatic activation.
Precooling the Vehicle Interior
In warmer climates, the Code Alarm remote start offers a convenient precooling feature for your vehicle’s interior. By activating the air conditioning system, the cabin temperature is lowered before you enter.
This provides immediate relief from the heat, making your drive more comfortable. Similar to preheating, the system typically defaults to the AC’s previous settings.
Before remote starting, ensure your vehicle’s air conditioning is set to the desired temperature and fan speed for effective precooling; Some advanced systems offer programmable cooling profiles.
Programming Run Time and Extension
The Code Alarm system allows users to customize the remote start run time, typically ranging from 15 to 30 minutes. This personalization ensures the vehicle is adequately warmed or cooled before entry.
The run time extension feature provides additional operating time while the vehicle is already running remotely, activated by a subsequent remote control press.
Programming these settings usually involves a sequence of ignition key turns and button presses on the remote or the system’s valet/programming button, as detailed in the system’s specific instructions.
User Programmable Run Time Settings
Code Alarm’s user-programmable run time settings empower owners to tailor the remote start duration to their preferences. Typically, options include 15, 20, 25, and 30-minute intervals.
Programming is generally achieved through a specific sequence involving the ignition key – turning it ON/OFF a set number of times – combined with pressing the valet/programming button. The system responds with audible chirps to confirm the selected duration.
Consult your system’s manual for the precise procedure, as variations exist between models. Accurate programming ensures optimal vehicle pre-conditioning without excessive battery drain.
Run Time Extension Feature
The Run Time Extension feature allows you to add extra minutes to an active remote start session. This is particularly useful during extremely cold or hot weather, providing extended pre-conditioning.
Activation typically involves pressing a specific button combination on your remote control while the engine is already running via remote start. The system will usually acknowledge the extension with a chirp or light flash.
Refer to your Code Alarm manual for the exact button sequence, as it varies by model. Be mindful of battery drain when utilizing this feature extensively.
System Indicators and Troubleshooting
Code Alarm systems utilize LED indicators and light flashes to communicate system status and potential issues. Understanding these signals is crucial for diagnosing problems. A rapidly flashing LED often indicates a system malfunction or unprogrammed remote.
Solid LED lights typically signify normal operation, while intermittent flashes can denote specific errors. Consult your owner’s manual for a comprehensive decoding of these signals.
Troubleshooting common issues like a non-responsive remote or chirping errors often begins with checking the remote battery and ensuring proper programming.
LED Indicator Light Signals
The LED indicator light provides vital feedback regarding your Code Alarm system’s operational status. A consistently lit LED generally confirms the system is armed and functioning correctly. Rapid flashing often signals a fault, such as an unprogrammed remote or a detected system issue requiring attention.
Slow, intermittent flashes can indicate successful programming or a specific system mode. Refer to the detailed chart in your owner’s manual for precise interpretations of each flash pattern.
Pay close attention to the LED during programming sequences to confirm successful steps.
Light Flash Indications and Meanings
Your Code Alarm system communicates through light flashes, offering diagnostic information when the LED indicator is observed. A three-chirp sequence, followed by three flashes, typically confirms successful entry into programming mode. Conversely, one chirp signifies “ON” while two chirps indicate “OFF” during valet mode adjustments.
Rapid, continuous flashing often denotes a system malfunction or an unprogrammed remote control. Consult the troubleshooting section for specific error codes.
Understanding these flash patterns is crucial for diagnosing and resolving system issues efficiently, ensuring optimal performance.
Programming a New Remote Fob
To program a new remote fob, initiate the programming mode using the valet/programming button. Typically, this involves cycling the ignition from ON to OFF multiple times – often ON, OFF, ON, OFF – and then pressing the valet button a specific number of times, like three.
The system will acknowledge entry into programming mode with a chirp. Subsequently, press a button on the new fob to synchronize it with the system. Successful synchronization is usually confirmed by another audible chirp or a light flash.
Refer to the specific model instructions for precise steps.
Entering Programming Mode
Initiating programming mode requires a specific sequence, often involving the vehicle’s ignition. Turn the ignition ON, then OFF, repeating this cycle a predetermined number of times – commonly ON, OFF, ON, OFF. This prepares the system to accept new fob information.
Immediately after the final ignition cycle, locate and press the valet/programming button. Holding this button for a specified duration, or pressing it a set number of times, activates programming mode.
Confirmation is crucial; the system typically responds with an audible chirp or a visual signal, indicating readiness for fob synchronization.
Remote Fob Synchronization Process
With the system in programming mode, press and hold any button on the new remote fob. The system should acknowledge the signal with a chirp or flash, confirming initial detection of the fob.
Repeat this process for each additional fob you wish to program, ensuring each fob is recognized individually. The system may provide a different audible confirmation for each successful synchronization.
To finalize programming, typically, you’ll need to exit programming mode. This is often achieved by repeating the ignition cycle or pressing the valet button again.
Valet/Programming Button Functions
The valet/programming button is crucial for system control, often located on the antenna or within the vehicle’s interior. Pressing and releasing it three times can toggle the remote start valet mode on or off, indicated by single or dual chirps.
Holding this button initiates programming mode, allowing for remote fob synchronization. It’s also used for system reset or override functions, depending on the model. Carefully consult your specific system’s instructions for precise operation, as procedures can vary.
Locating the Valet/Programming Button
Identifying the valet/programming button is the first step for system control and customization. Typically, it’s found on the antenna, often a small, recessed button. However, some models house it within the vehicle’s interior, potentially under the dashboard or near the ignition switch.
Consult your specific Code Alarm system’s documentation for the exact location, as it varies by model. Look for a button labeled “Valet,” “Prog,” or a combination thereof. Careful examination of these areas will reveal the button needed for programming and valet mode activation.
Using the Valet Button for System Control
The valet button offers crucial control over your Code Alarm system. Pressing and releasing it three times toggles Remote Start Valet Mode on or off, indicated by one chirp for “on” and two for “off.” This prevents unauthorized remote starts.
Holding the valet/override button, often located on the antenna, initiates programming sequences. The system confirms entry into programming mode with three chirps. This button is essential for adding new remotes or adjusting system settings, ensuring personalized security and convenience.
Troubleshooting Common Issues
If your remote start fails to respond, first check the remote’s battery and ensure a clear line of sight to the vehicle. Persistent issues may indicate a system malfunction, requiring further investigation. System chirping errors often signal specific problems; consult the LED indicator light signals section for decoding.
Verify the valet mode isn’t activated, as this disables remote start functionality. If problems persist, refer to the system’s programming mode to resynchronize the remote. A professional installation check might be necessary for complex issues.
Remote Start Not Responding
If the remote start isn’t functioning, begin by verifying the remote control’s battery. A weak battery is a common cause. Ensure there’s a clear, unobstructed path between the remote and your vehicle. Check if the valet mode is engaged, as this will disable the remote start feature. Confirm the system hasn’t entered a security lockout due to multiple incorrect attempts.
If the issue continues, attempt to resynchronize the remote fob with the system using the programming procedure. A professional diagnosis may be needed if these steps don’t resolve the problem.
System Chirping Errors
Code Alarm utilizes chirps to communicate system status. Different chirp patterns indicate specific issues. One chirp generally confirms a successful operation, like valet mode activation. Two chirps often signal an error or a feature being turned off. Multiple chirps, such as three, can indicate entering programming mode or a system reset.
Refer to the LED indicator light signals alongside the chirps for a precise diagnosis. Consult the full manual for a comprehensive list of chirp codes and their corresponding meanings to accurately troubleshoot any system malfunctions.
Replacing the Remote Control
When your Code Alarm remote fails, a replacement is necessary. First, locate a compatible replacement – ensure it matches your system’s FCC ID (ELVATCC). Sources include automotive dealerships and specialized remote retailers. After acquiring a new fob, programming is crucial for functionality.
This process typically involves entering programming mode via the system’s valet/programming button. Follow the manual’s synchronization steps carefully, often requiring multiple button presses and ignition key cycles. Test the new remote thoroughly after programming to confirm operation.
Finding a Compatible Replacement
Locating a compatible Code Alarm remote requires careful attention to detail. Begin by identifying your system’s specific model number and, crucially, the FCC ID (ELVATCC) printed on the original remote. This ID ensures compatibility. Avoid generic replacements; they often lack the necessary programming or functionality.
Reliable sources include authorized Code Alarm dealers, automotive locksmiths, and online retailers specializing in keyless entry remotes like Keylessentryremotefob.com. Always verify the seller’s reputation and return policy before purchasing. Confirm the remote supports your vehicle’s features.
Programming the Replacement Remote
Programming a new Code Alarm remote typically involves accessing the system’s programming mode via the valet/programming button. Turn the ignition ON, OFF, ON, OFF – this sequence is often crucial. Press and release the valet/programming button three times; the system should chirp to confirm entry into programming mode.
Then, press one button on the new remote. The system will respond with chirps indicating success. Test all remote functions after programming. If unsuccessful, repeat the process or consult a professional. Remember, precise timing and sequence are vital for successful synchronization.
Understanding FCC ID and Compliance
The Federal Communications Commission (FCC) regulates radio frequency devices, including your Code Alarm remote. Locating the FCC ID – often found on the remote’s circuit board or casing – is essential for verifying compliance. This ID (e.g., ELVATCC) identifies the device to the FCC.
Ensuring FCC compliance means the remote operates within legal radio frequency limits, preventing interference with other devices. Modifications to the remote without FCC approval are prohibited. Maintaining compliance safeguards proper functionality and avoids potential legal issues.
Locating the FCC ID on Your Remote
Finding the FCC ID is crucial for compliance verification and replacement parts ordering. Typically, the FCC ID is imprinted on the remote control’s circuit board. Accessing this requires carefully disassembling the remote’s casing – a process that should only be undertaken if comfortable with electronics;
Alternatively, the FCC ID might be subtly marked on the remote’s plastic housing, often near the battery compartment. Look for a string of characters beginning with “ELV” as indicated in available resources. Documentation accompanying the original remote may also list the FCC ID.
Ensuring FCC Compliance
Code Alarm remote start systems are designed to comply with Federal Communications Commission (FCC) regulations. This compliance ensures minimal interference with other electronic devices. Modifying the system or operating it outside of specified parameters can void this compliance.
It’s vital to avoid unauthorized alterations to the remote control’s hardware or software. Using only approved replacement parts is essential. The FCC ID, once located, confirms the device’s certification. Maintaining the system’s integrity safeguards against potential legal issues and ensures reliable operation.
Advanced System Features
Certain Code Alarm systems offer integration with SmartStart, enabling remote control and vehicle status monitoring via a compatible smartphone. This allows for functionalities like GPS tracking, door lock/unlock, and alarm control. Mobile app control provides convenient access to your vehicle’s security and comfort features from anywhere with cellular connectivity.
These advanced features enhance convenience and security, but require a separate subscription and compatible hardware. Check your system’s documentation to confirm SmartStart compatibility. Utilizing these features expands the capabilities of your remote start system beyond basic operation.
SmartStart Integration (if applicable)

SmartStart allows remote control of your Code Alarm system via a smartphone app, offering features beyond the standard remote fob. This includes remote start, lock/unlock, trunk release, and alarm status. GPS tracking functionality provides vehicle location, aiding in security and recovery. A SmartStart subscription is required and is managed directly through Directed Electronics.
The app provides real-time vehicle status updates and customizable alerts. Installation requires a compatible SmartStart module connected to your Code Alarm system. Ensure proper installation and activation of your subscription for full functionality.
Mobile App Control (if applicable)

If your Code Alarm system is equipped with a compatible module, a dedicated mobile app provides enhanced control and monitoring capabilities. This app mirrors many remote fob functions, allowing you to start, lock, unlock, and even locate your vehicle from your smartphone. Real-time alerts for alarm triggers and vehicle status are delivered directly to your device.
The app interface is user-friendly, offering a convenient alternative to the traditional remote. Download and installation instructions are typically provided with the system or through the Directed Electronics website. Ensure your smartphone meets the app’s system requirements for optimal performance.