Importance of Using PDF Plans for Woodworking Projects
PDF woodworking plans provide clear instructions‚ diagrams‚ and cut lists‚ ensuring accuracy and efficiency. They include shopping lists and step-by-step guides‚ making projects accessible for all skill levels. Digital access allows easy customization and saves time‚ while detailed diagrams ensure precise measurements for professional results.
Materials and Tools Required for Building a Queen Bed Frame
Building a queen bed frame requires standard dimensional lumber‚ such as 4×4‚ 2×8‚ 2×6‚ and 2×4 boards‚ which are readily available at most DIY stores. Additional materials include wood screws‚ bolts‚ and wood glue for secure joints. Sandpaper and wood filler are essential for smoothing surfaces and hiding imperfections. A drill‚ circular saw‚ and measuring tape are must-have tools‚ along with clamps for holding pieces in place during assembly. A level ensures the frame is even‚ while a stud finder helps locate wall studs for stable installation. For finishing‚ stain‚ paint‚ or sealant can be applied to protect the wood and enhance its appearance. Optional materials like decorative trim or upholstery fabric can add a personalized touch. Ensure all tools and materials are gathered before starting to streamline the building process. Proper preparation and organization are key to achieving a professional-quality bed frame. By using these materials and tools‚ you can construct a sturdy and stylish queen bed frame tailored to your needs.
Design Options for Queen Bed Frames
Queen bed frames offer diverse design options‚ from modern minimalist styles to rustic farmhouse looks and Japanese-inspired timber framing. Each design caters to different aesthetics‚ ensuring a perfect fit for any bedroom decor while maintaining functionality and comfort.
3.1 Modern and Minimalist Designs
Modern and minimalist queen bed frames emphasize clean lines‚ simple shapes‚ and a focus on functionality. These designs often feature low-profile platforms‚ sleek headboards‚ and minimal ornamentation‚ creating a contemporary look that complements any bedroom decor. The use of standard dimensional lumber‚ such as 2x4s‚ 2x6s‚ and 2x8s‚ allows for easy construction while maintaining durability. Many PDF woodworking plans offer step-by-step instructions for building these frames‚ including cut lists and diagrams‚ making them accessible to beginners; Some plans incorporate interlocking Japanese joinery‚ eliminating the need for hardware and providing a sturdy‚ knock-down design. These frames are ideal for those who prefer a clutter-free‚ modern aesthetic and are looking to save money by building their own bed. With options for various finishes and materials‚ minimalist designs offer versatility while maintaining a sleek‚ sophisticated appearance.
3.2 Rustic and Farmhouse Styles
It seems like your request is incomplete. Could you please specify the exact subheading or section you’d like me to generate text for? I’ll ensure it meets your requirements and guidelines!
3.3 Japanese-Inspired Timber Framing
Japanese-inspired timber framing offers a sleek‚ minimalist approach to constructing a queen bed frame. This style emphasizes clean lines‚ natural wood textures‚ and the use of traditional Japanese joinery techniques‚ such as interlocking parts without the need for hardware. The design often features a low profile‚ creating a sense of simplicity and elegance in the bedroom. These plans typically include detailed instructions for constructing a sturdy frame using solid hardwoods like pine or oak‚ ensuring durability and aesthetic appeal. The minimalist aesthetic of Japanese-inspired designs makes them versatile‚ fitting seamlessly into both modern and traditional interiors. Additionally‚ the use of natural materials and traditional techniques ensures a timeless and eco-friendly construction. Many PDF plans for Japanese-inspired bed frames include step-by-step diagrams and cut lists‚ making the project accessible even for those new to woodworking. This style is perfect for those who appreciate a blend of functionality and cultural elegance‚ creating a peaceful and serene sleeping environment. The design also often incorporates space-saving features‚ making it ideal for smaller rooms while maintaining a spacious feel. With its focus on craftsmanship and simplicity‚ Japanese-inspired timber framing is a popular choice for DIY enthusiasts seeking a unique and durable bed frame.
Steps to Build a Queen Bed Frame
Start by following detailed PDF plans‚ ensuring accurate measurements and material preparation. Cut lumber according to the cut list‚ then construct the frame using basic tools. Assemble the parts securely‚ and sand for a smooth finish. This step-by-step approach ensures a sturdy and professional result.
4.1 Planning and Measuring
Planning and measuring are crucial steps in building a queen bed frame. Start by reviewing the PDF woodworking plans to understand the project’s scope and requirements. Measure your bedroom space to ensure the bed fits perfectly‚ considering both the mattress size and any additional features like headboards or storage. Use a tape measure to verify the dimensions of the lumber and materials‚ ensuring they match the cut list provided in the plans. Double-check all measurements to avoid errors during construction. Proper planning helps in organizing tools and materials efficiently‚ while accurate measuring ensures the frame’s stability and appearance. By carefully following the PDF guide‚ you can achieve precise cuts and a professional finish‚ making the project both enjoyable and rewarding.
4.2 Preparing Materials and Cutting Lumber
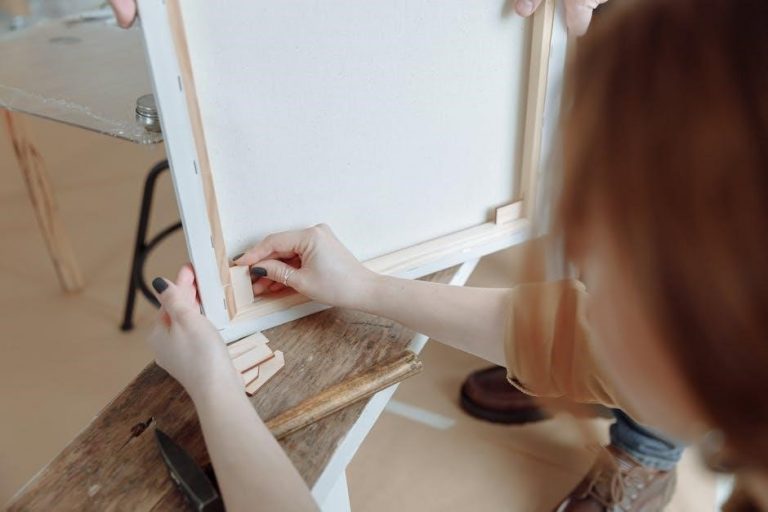
Preparing materials and cutting lumber is a foundational step in building a queen bed frame. Begin by gathering all the necessary tools‚ such as a circular saw‚ drill‚ measuring tape‚ and sandpaper. Ensure you have all the required lumber‚ including 4x4s for the legs‚ 2x6s for the side rails‚ and 2x4s for the slats. Refer to the PDF plans for the exact quantities and dimensions. Sort and organize the materials to avoid confusion during the cutting process. Use a pencil to mark each piece according to the cut list provided in the plans‚ ensuring accurate measurements. Cut the lumber carefully‚ starting with the longest pieces first to minimize waste. Sand each cut piece to smooth out rough edges and surfaces. For angled cuts‚ such as those required for a headboard or footboard‚ use a miter saw or a circular saw with a guide. Double-check each cut against the plans to ensure precision. Properly label and store the cut pieces to maintain order and simplify the assembly process. Always wear safety gear‚ including goggles and a dust mask‚ when cutting and sanding lumber.
4.3 Constructing the Bed Frame
Constructing the bed frame begins with assembling the base structure. Start by attaching the side rails to the legs using wood screws or bolts‚ ensuring a sturdy foundation. Use clamps to hold the pieces in place while drilling pilot holes to avoid splitting the wood. For added stability‚ reinforce the joints with wood glue and clamp them until the adhesive sets. Next‚ attach the center support beams to the side rails‚ spacing them evenly to provide adequate support for the mattress. These beams help distribute weight evenly and prevent sagging. If using slats‚ lay them across the side rails‚ securing them with screws or nails. Ensure the slats are evenly spaced and tightly fitted to create a solid base for the mattress. For a platform-style bed‚ attach the plywood or MDF panel on top of the slats‚ sanding the edges for a smooth finish. Once the base is complete‚ move on to constructing the headboard and footboard‚ following the PDF plans for precise measurements and assembly instructions. Always double-check the frame’s squareness by measuring the diagonals to ensure accuracy. Finally‚ sand all surfaces to prepare the frame for finishing touches like staining or painting.
4.4 Assembling and Securing the Frame
Assembling the bed frame involves bringing together all the pre-cut and prepared components. Start by attaching the headboard and footboard to the side rails using bolts or screws‚ ensuring they are aligned properly. Use clamps to hold the pieces in place while tightening the hardware. For added stability‚ reinforce the joints with wood glue and clamp them until the adhesive sets. Next‚ attach the center support beams to the side rails‚ ensuring they are evenly spaced to provide adequate support for the mattress. If using slats‚ lay them across the side rails‚ securing them with screws or nails. Ensure the slats are evenly spaced and tightly fitted to create a solid base for the mattress; For a platform-style bed‚ attach the plywood or MDF panel on top of the slats‚ sanding the edges for a smooth finish. Once the base is complete‚ move on to constructing the headboard and footboard‚ following the PDF plans for precise measurements and assembly instructions. Always double-check the frame’s squareness by measuring the diagonals to ensure accuracy. Finally‚ sand all surfaces to prepare the frame for finishing touches like staining or painting.

Choosing the Right Mattress Size and Bed Frame Dimensions
Selecting the correct mattress size and corresponding bed frame dimensions is crucial for a seamless fit and optimal comfort. A standard queen-size mattress measures 60 1/2″ x 80 1/2″‚ and the bed frame should be designed to accommodate these dimensions precisely. The frame’s height‚ including the mattress‚ should be around 26 3/4″‚ with a clearance of approximately 11 3/4″ at the bottom for storage. Ensure the bed frame’s width and length match the mattress‚ leaving minimal gaps to prevent shifting. Consider the bedroom’s space and desired aesthetic when choosing the frame’s height and style. Taller frames offer more storage potential‚ while lower profiles create a modern‚ minimalist look. Measure the room’s doorway and hallway to ensure the assembled frame can be moved without issues. Finally‚ verify the weight capacity of the bed frame to support both the mattress and the intended users. Proper alignment of the mattress and frame ensures longevity‚ comfort‚ and a polished appearance in the bedroom.
Budget Considerations and Cost Savings
Building a queen bed frame using PDF woodworking plans can significantly reduce costs compared to purchasing a pre-made frame. By using off-the-shelf lumber and basic tools‚ DIY enthusiasts can save hundreds of dollars. Standard materials like 2x4s‚ 2x6s‚ and 2x8s are affordable and widely available‚ making the project budget-friendly. Additionally‚ creating a bed frame at home eliminates retail markups‚ allowing for customization without extra fees. Many free or low-cost plans include shopping lists and cut lists‚ helping to minimize waste and optimize material usage. Beginners can also avoid expensive tools by sticking to basic equipment. Overall‚ DIY projects offer a cost-effective solution for homeowners seeking to upgrade their bedrooms without breaking the bank. With careful planning‚ a queen bed frame can be built for a fraction of the cost of store-bought options‚ providing both financial savings and a sense of accomplishment.
DIY vs. Pre-Made Bed Frames: Pros and Cons
When deciding between a DIY queen bed frame and a pre-made option‚ several factors come into play. DIY projects offer customization‚ allowing you to choose designs‚ materials‚ and sizes tailored to your preferences. This approach can save money‚ especially with free or low-cost PDF plans that include detailed instructions and cut lists. However‚ DIY requires time‚ effort‚ and basic woodworking skills. Beginners may find it challenging‚ but many plans are designed to be beginner-friendly. On the other hand‚ pre-made bed frames provide convenience and quick assembly‚ often with warranties. They are ideal for those short on time or lacking DIY experience. However‚ pre-made frames can be expensive and may not offer the same level of customization. Ultimately‚ DIY is perfect for those seeking a cost-effective‚ personalized solution‚ while pre-made frames suit those prioritizing convenience and ease. Both options have their merits‚ depending on individual needs and preferences.
Additional Features and Customizations
Enhance your queen bed frame with storage drawers‚ shelves‚ or an upholstered headboard. Customizations like Japanese-inspired joinery or rustic finishes add unique style. Plans often include options for platform beds‚ drawers‚ and more‚ allowing you to tailor the design to your needs and preferences.
8.1 Adding Storage Drawers or Shelves
Add functionality to your queen bed frame by incorporating storage drawers or shelves. This feature is ideal for small spaces‚ providing ample room for linens‚ clothes‚ or personal items. Many PDF plans include detailed instructions for building drawers with precise measurements and step-by-step assembly guides. You can customize the design to match your bed’s style‚ whether modern‚ rustic‚ or minimalist. Some plans even offer options for adjustable shelves or sliding compartments‚ enhancing versatility. Adding storage not only enhances practicality but also elevates the bed’s aesthetic appeal. With clear diagrams and materials lists‚ these woodworking plans make it easy to integrate storage solutions seamlessly into your project;
Safety Tips for Woodworking Projects
Ensuring safety is crucial when working on woodworking projects like building a queen bed frame. Always wear protective gear‚ including safety glasses and gloves‚ to prevent injuries from flying debris or sharp tools. Keep loose clothing and long hair tied back to avoid accidents with power tools. Maintain a clean and well-lit workspace to reduce tripping hazards and improve visibility. Use tools only for their intended purposes and follow manufacturer instructions carefully. Never leave power tools unattended or within reach of children. Properly secure lumber before cutting or drilling to prevent unexpected movement. Avoid overreaching or working while fatigued‚ as this can lead to loss of control. Keep a fire extinguisher nearby and ensure good ventilation when using paints or stains. Regularly inspect tools for damage or wear and replace them as needed. Follow proper lifting techniques to avoid strain or injury when handling heavy materials. Familiarize yourself with emergency procedures‚ such as treating cuts or splinters‚ and keep a first-aid kit on hand. By prioritizing safety‚ you can enjoy a successful and injury-free woodworking experience.
Troubleshooting Common Issues During Construction
During the construction of a queen bed frame‚ several common issues may arise. One of the most frequent problems is misaligned joints or uneven surfaces‚ which can occur due to improper measurements or cuts. To address this‚ double-check your cut list and ensure all lumber is properly aligned before securing it. Another issue is wobbling or instability‚ often caused by uneven legs or insufficient support slats. Adding extra slats or adjusting the leg heights can resolve this. If the frame feels too tight or too loose when assembling‚ verify that all pieces are cut to the correct dimensions and use clamps to hold components in place while securing them. Warped or bowed lumber can also pose challenges; replacing defective pieces or using wood straightening techniques can help. Additionally‚ if screws or bolts strip during assembly‚ use a higher-quality fastener or pre-drill pilot holes to prevent damage. Finally‚ if the mattress does not fit properly‚ check the frame dimensions against the mattress size to ensure compatibility. Addressing these issues early can save time and ensure a sturdy‚ professional-looking final product.

Maintenance and Upkeep of the Bed Frame
Proper maintenance and upkeep are essential to extend the life of your queen bed frame. Regularly inspect the frame for signs of wear‚ such as loose joints or scratches‚ and address them promptly. Dust and vacuum the frame‚ especially in areas where dust tends to accumulate‚ such as under the bed or along the slats. For wooden frames‚ periodically applying a wood conditioner or furniture wax can protect the finish and maintain its appearance. Avoid using harsh chemicals or abrasive cleaners‚ as they may damage the wood or finish.
If you notice any wobbling‚ tighten the bolts or screws. For added stability‚ consider adding felt pads to the feet of the bed frame to prevent scratching on hardwood floors. Additionally‚ rotate or flip the mattress regularly to ensure even weight distribution and prevent sagging. For frames with storage drawers‚ keep the contents organized to avoid overloading‚ which could strain the structure. Seasonal humidity changes can cause wood to expand or contract‚ so monitor the frame’s stability during these periods. By following these simple care tips‚ you can ensure your handmade queen bed frame remains sturdy‚ functional‚ and visually appealing for years to come.
Resources and Next Steps for Further Learning
For those looking to expand their woodworking skills or explore more complex projects‚ numerous resources are available to guide further learning. Websites like The Free Woodworking Plans and Projects Resource offer extensive libraries of DIY plans‚ including detailed instructions for queen bed frames. Platforms like Etsy provide premium PDF woodworking plans with step-by-step diagrams‚ cut lists‚ and shopping lists‚ perfect for refining your craftsmanship.
Online forums and woodworking communities are excellent places to connect with experienced makers‚ share tips‚ and troubleshoot challenges. YouTube channels and woodworking blogs often feature tutorials and project walkthroughs‚ offering visual guidance for intricate techniques. Additionally‚ courses on platforms like Udemy or Skillshare can help beginners master essential woodworking skills‚ from basic joinery to advanced furniture-making methods.
Exploring books and eBooks on woodworking can also deepen your understanding of materials‚ tools‚ and design principles. Many creators share their projects on social media‚ providing inspiration and ideas for customization. By leveraging these resources‚ you can continue to improve your woodworking abilities and tackle more ambitious projects with confidence.